 ....
« back
.....
next »
....
« back
.....
next »
Coats of arms – then and now
Heraldic coats of arms have been a visible sign of origin, rank and identity for centuries. Originally they helped to recognise knights and nobles in armour – today more and more people are interested in their roots and would like to bear their own family coat of arms or a personal civic coat of arms.
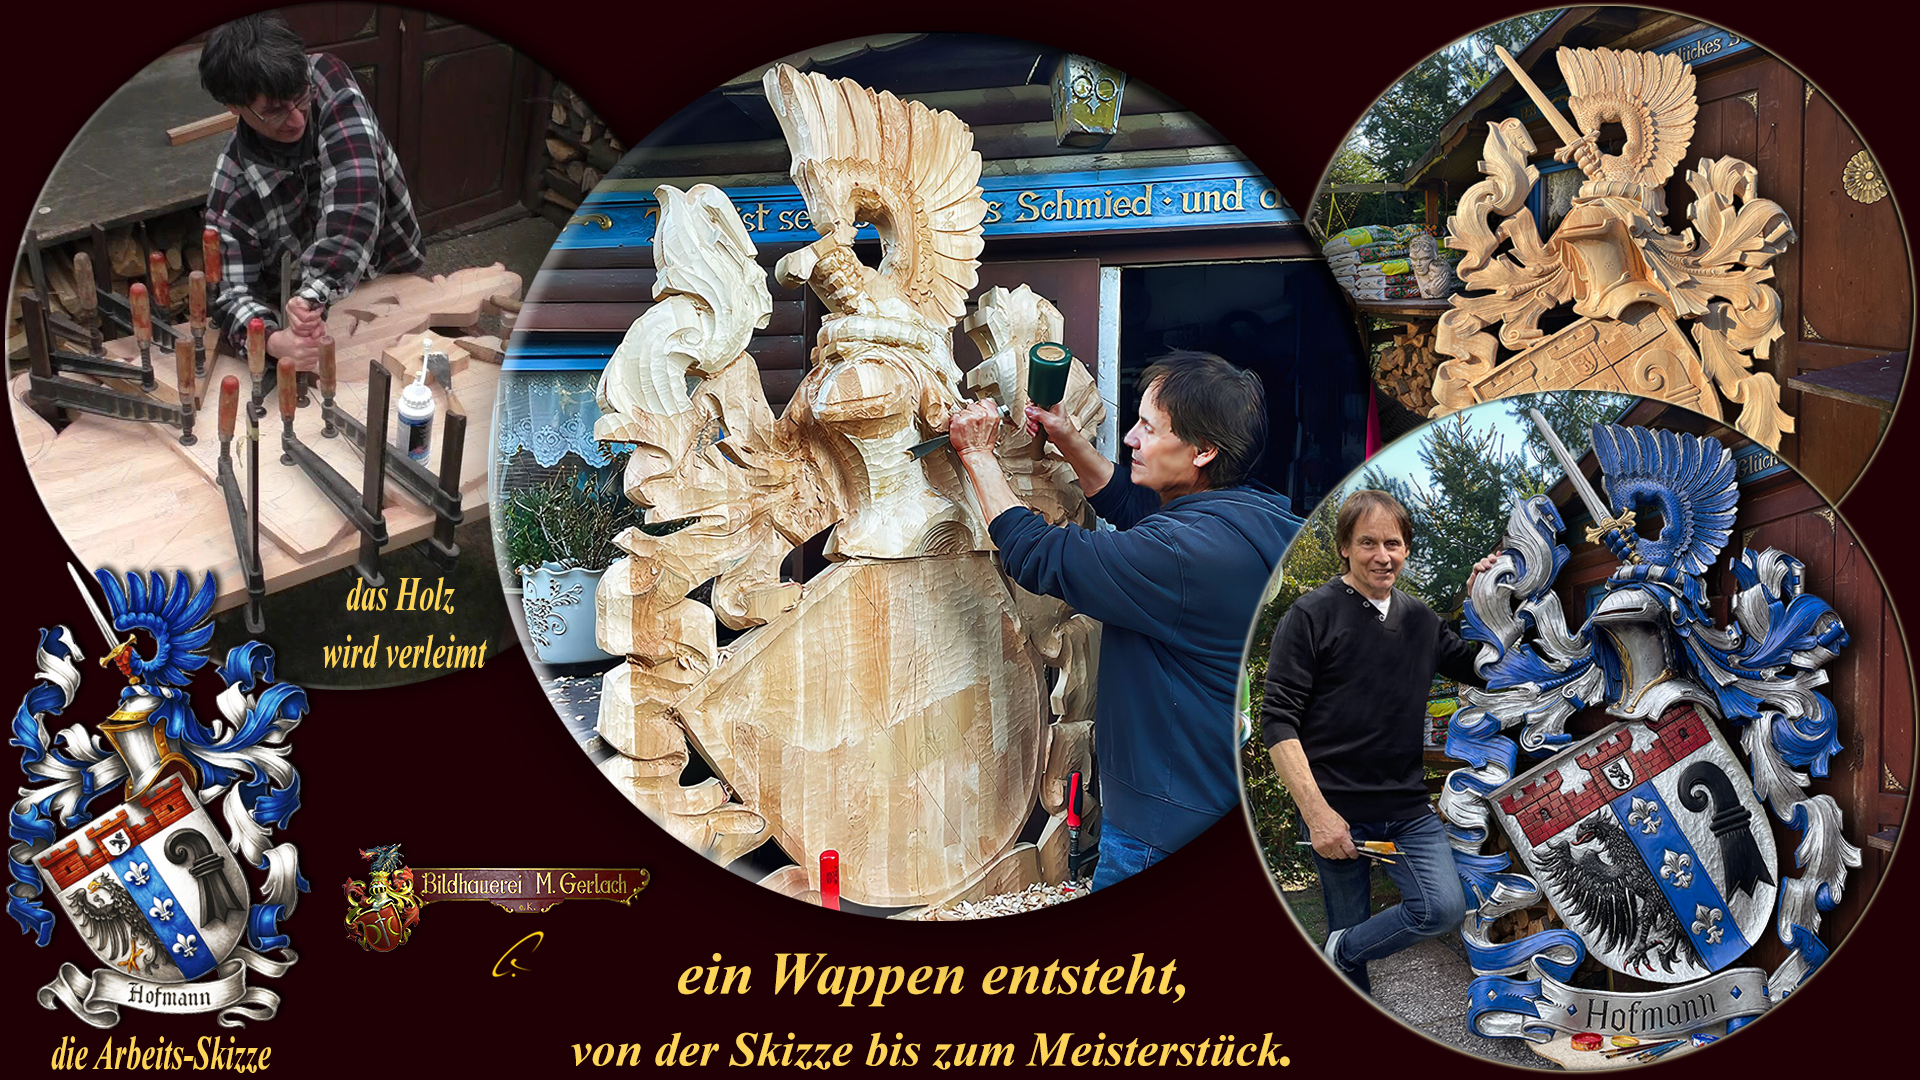
This enthusiasm for heraldry creates work for genealogists, heraldists, artists and craftspeople. In my workshop in Wrestedt, hand-carved coats of arms made of wood are created – from the first design to the finished piece painted in heraldic colours.
This photo shows the individual stages – from the 1:1 drawing to the finished, carved and painted
noble or alliance coat of arms. You can find an extensive photo documentation here:
Bookflip – Wappen v. Emme
.
An overview of my work – family, noble, student fraternity and municipal coats of arms –
can be found on my overview page:
Coats of Arms – Overview (Gerlach)
.
In practice, there are three typical ways:
If required, I work with experienced heraldists. A new design can be registered in a coat-of-arms register, for example at the Münchner Wappen-Herold . Registration is subject to fees, but it offers the bearer more security against misuse.
Over time, different types of coats of arms have developed. In my workshop I create, among others:
Examples can be found here:
Wall of Fame – Bookflip and City arms – photo documentation .
Everything starts with the design – either an existing official reference (e.g. from a register) or a new design based on the client’s wishes. From this I produce a full-scale 1:1 working drawing, which is then transferred to the wooden panel.
At this stage I already define:
For a larger coat of arms (e.g. about 65 cm height) I use a base panel of about 4.5 cm thickness. This panel is built from several wooden blocks that are interlocked and glued.
The interlocking glue-up helps neutralise the natural tensions of the wood:
After the base panel is ready, I transfer the 1:1 drawing onto the wood and cut out the outline. Thicker sections (helmet, shield, crest) are often built up by gluing additional wood on top to gain more relief height.
I have documented these steps in a small slide show:
Dia documentation – Heidelberg coat of arms
Now the true carving begins: the coat of arms is carved entirely by hand, without CNC machines.
First comes the rough shaping: highs and lows, the positioning of helmet, crest, mantling and shield are modelled in relief. Here I define the overall harmony and perspective.
At the same time I work on the back. To make the piece look visually lighter on the wall, material is removed in areas behind the highest points on the front.
In the fine carving stage all details are created: edges, curves, veins, folds of the mantling, feathers, fur structures and more. Every cut influences the expression and the final impact.
After carving, the coat of arms is painted according to heraldic rules: metals (gold, silver), colours (red, blue, black, green, purple) and, if required, furs.
Step by step, base colours are applied, shadows and highlights are worked out and the relief becomes clearly visible. On request, parts can be finished with gold leaf or silver leaf or lightly patinated to create a more historic character.
For newly designed family coats of arms, a registration in a coat-of-arms register can be useful. Together with a heraldist, the design is checked, blazoned and recorded.
The finished coat of arms leaves my workshop ready for mounting, securely packed for shipment by parcel service or freight carrier. You receive a unique, durable piece that can accompany a family for generations.
If you are thinking about commissioning a hand-carved wooden family coat of arms, or if you have questions about turning an existing design into a carved piece, simply send me an email – ideally with a drawing, photo or short description.
General information about types of coats of arms, pricing and the process can also be found on Coat of arms info and in the heraldry glossary.
Master woodcarver Manfred Gerlach